Extra Drives
If you have a second hard drive or SSD, use KDE Partition Manager to set it up. Useful for storing games and pointing launchers like Steam at a dedicated drive, or just for extra space to save files.
Screenshots in this guide were taken using a USB stick as a stand-in since we did not have multiple hard drives available while writing it. The steps are identical for any drive.
What does mounting mean?
Mounting makes a drive accessible at a specific folder path on your system. Until a drive is mounted, BlossomOS cannot read or write to it. The mount point is just a regular folder, for example /mnt/data, that acts as the entry point to everything on that drive.
This will erase all data on the drive The steps below delete all existing partitions and create a new one. Everything on that drive will be gone. Make sure you have the right drive selected and that nothing important is on it.
Prepare the Drive
Open KDE Partition Manager and enter your password when prompted.
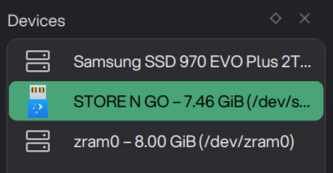
Select your drive from the device list on the left. Check the size shown to make sure you have the right one.
If the partition is mounted (shown with a lock icon), right-click it and choose Unmount. If all actions are greyed out, the drive is still mounted. Unmounting it first will make them available again.

Right-click each existing partition and choose Delete until all space shows as unallocated.
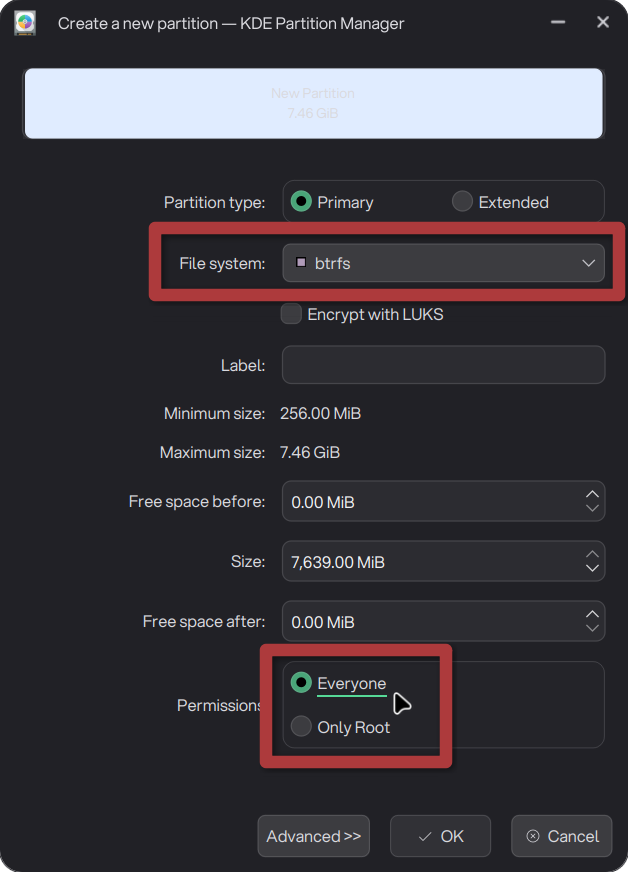
Right-click the unallocated space and choose New. Give it a label, leave the filesystem as-is, and make sure Permissions is set to Everyone. Only change the filesystem if you need NTFS for dual boot.
btrfs (Default) - btrfs is already selected by default. Leave it as-is for the best experience on BlossomOS.
NTFS (Dual Boot)
Not suitable for most cases NTFS does not support Linux executable permissions. Native Linux apps and games will refuse to launch from it, and some Wine/Proton games may also fail. Only use this if you specifically need the drive accessible on Windows too.
Set filesystem to NTFS.
Click Apply in the toolbar and confirm. KDE Partition Manager will format the drive.
Set Up Auto-Mount
Do not skip this step Without auto-mount, the drive will not be available after a reboot and apps will not find it. Each drive needs its own unique mount point.
Right-click your newly created partition and choose Manage Mount Points….
Click Add and set a mount point, for example
/mnt/data. If you have multiple drives, each one needs a different path, for example/mnt/dataand/mnt/games.Make sure No automatic mount is unchecked so the drive mounts on every boot.
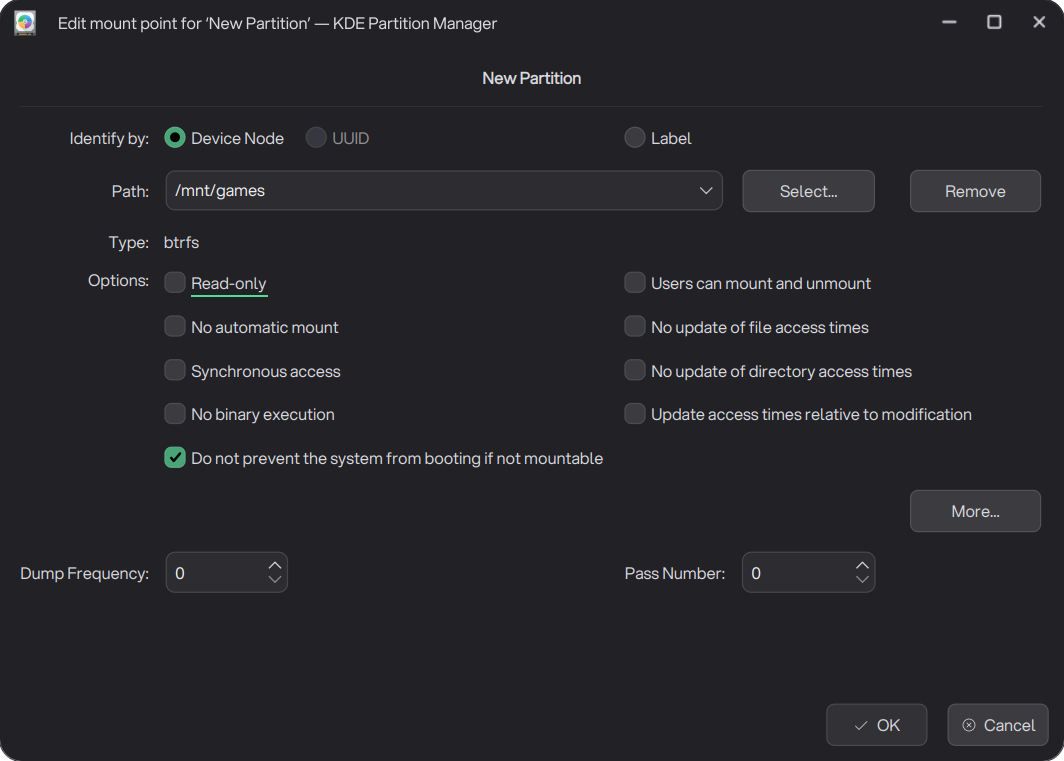
Click OK and confirm.
Troubleshooting
Drive is not accessible
If you set Permissions to Everyone in the partition creation step, you can skip this. If the drive is not accessible by your user, open Dolphin and navigate to your mount point:
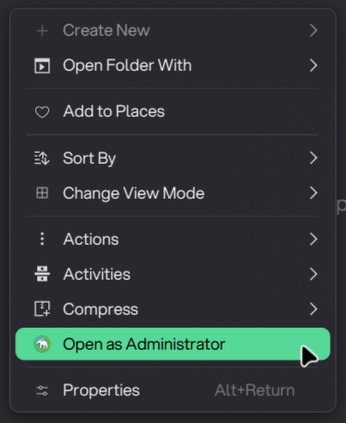
Right-click the folder and choose Open as Administrator.
In the administrator Dolphin window, right-click the folder again and go to Properties then Permissions.
Set Others to Can Read & Write.
Drive is not showing up after reboot
Open Dolphin and navigate to your mount point. Right-click the folder and open Properties. The General tab should show the filesystem type and the total size of your drive. If the folder appears empty or shows 0 bytes, the drive is not mounted.
To fix this without rebooting, open KDE Partition Manager, right-click the partition and choose Mount. If that does not help, a reboot will apply the auto-mount settings.
Apps cannot write to the drive
The drive may show root as the owner in Dolphin’s Permissions tab. Even with Everyone set to Can View & Modify Content, some apps will still fail to write to the drive if root is the owner. There is no GUI way to change ownership. Open a terminal and run this once:
sudo chown $USER:$USER /mnt/dataReplace /mnt/data with your actual mount point. After this, the drive is fully owned by your user account.